
The Back light can be placed directly behind the subject, with the vertical angle of the light between 30 and 45 degrees. Any steeper and you run the risk of creating very noticeable shadows on the subject or casting light on the front of the subject.
The Back light can be utilized at a variety of intensities, but typically it is about half as bright as the Key light. You can also tweak it a bit by adding a light orange or yellow gel to help bring out more color in a subject’s hair.
Even if you only have one or two lights, the principles of the three-point setup can still be used. If you only have one light, it becomes the Key light. If you have two lights, one is the Key and the other is either the Fill or the Back light (since you can use a reflector as a Key).
A Do-It-Yourself Lighting Kit
Professional lighting kits for video can be pretty expensive, especially if you need a lot of lights to cover a large area. That being said, it is possible to put together an adequate small lighting kit for less than $100.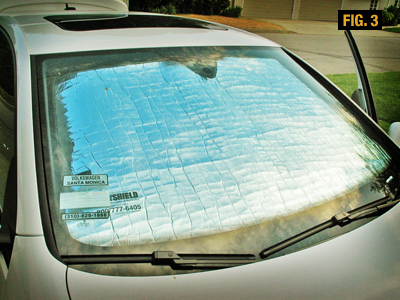
You will need:
• Three lights with stands
• Something to act as a reflector
• Power cables, extension cords, etc.
You can use some common halogen worklights found at any hardware store or purchased at Amazon.com for as little as $10 to $15. These come with or without a stand and range from 150W to 500W. Try to find a stand that goes up to at least six feet. (Figure 4)
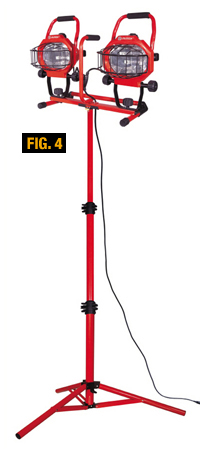 One drawback of these cheap lights is that the color temperature of the light is quite yellow. So long as you white-balance your camera this isn’t a huge issue, but if you want higher quality lighting you can either purchase a bulb with a white color temperature (ask your hardware supplier for a “32K” bulb) or place a colored gel in front of the light to correct the color.
Speaking of gels, the other big drawback of these lights is that there’s no built-in system for mounting accessories like gels and diffusers. You can improvise by creating a wire holder or separate stand for any accessories that you might need.
For a reflector, you can make your own from just about any large reflective object, although the exact color and reflectivity will affect your lighting. Common items you can use as an improvised reflector include:
A windshield sunshade
A sheet of foamcore (used for picture framing and available at an art store)
A polystyrene sheet
A sheet of stiff white cardboard
Some tin foil taped to some cardboard (try both sides of the foil for different effects)
A survival blanket (gold on one side and silver on the other)
Finally, you’ll need a few power extension cables of varying lengths, plus one or more heavy-duty power strips with built-in circuit breakers. Home Depot, Lowe’s or a hardware store will have them.