
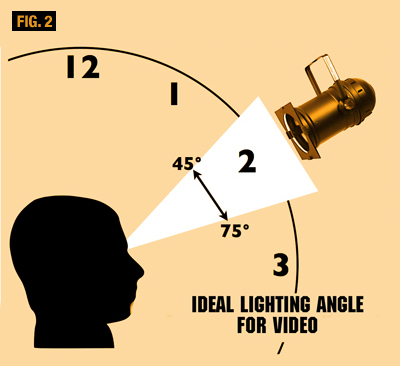
When you place lighting it is often helpful to refer to a light’s placement in terms of time. The camera is placed at the six o’clock position in relation to the subject (see Figure 1 again), and the Key light is placed at either the seven or five o’clock positions, so the subject’s face is fairly well lit with shadows starting to make an appearance on the side of the face opposite the Key.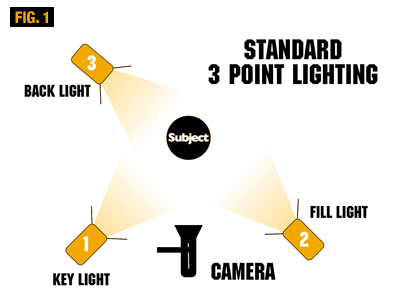
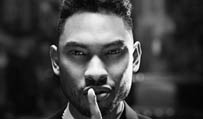
As you move the Key light closer to 12 o’clock, the skin features of the subject are emphasized to produce an aging effect, which may be what you want, but probably not. As the vertical angle (the height) is increased when you raise the Key light, you start to see shadows under the nose, chin and lips of the subject, which causes your subject to look more like they’re under interrogation.
The Fill Light
The Fill light is the secondary light and is used to fill in the shadows made by the Key light. It is placed on the opposite side of the Key light (see Figure 1 again), so if the Key was placed at seven o’clock, the Fill is placed at five. The difference between the Fill light and the Key is that the Fill is usually placed at a shallower vertical angle (if the Key is at 45 degrees, the Fill might be at 60 or 70 - see Figure 2), and it will not be as bright as the Key. If you can’t lower the intensity of the Fill light with a dimmer, either move it farther back or set it to operate as more of a floodlight than a spot.
 When using a Fill light it should never be so bright that it begins to compete with the Key, because you’ll start to see a new set of shadows. If you don’t use a Fill, you’ll find a lot of stark contrasts due to shadows across the subject’s surface, depending upon how harsh the Key light is.
Sometimes you can also use a reflector (such as a piece of white card-stock mounted off-camera, or even a white-painted wall) as a Fill light instead of an actual lamp (see Figure 3). Using this to reflect the Key light’s rays back upon the subject from a different angle can cause a softer, subtler effect than using another lamp.
The Back Light
The Back light (also called the Rim, Hair or Shoulder light) is placed behind the subject and lights it from the rear, giving it a rim of light that separates the subject from the background and enhances the perception of depth in the shot (see Figure 1 again).