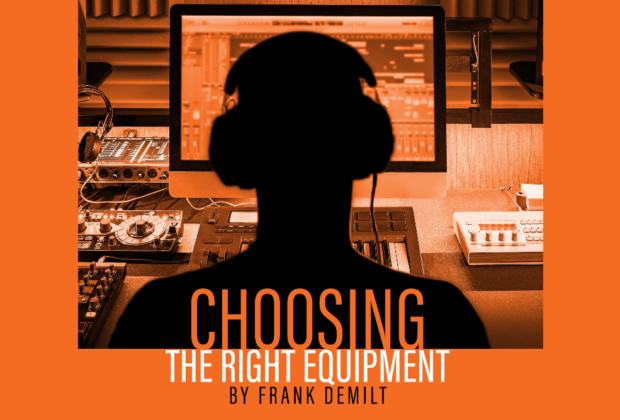
Choosing the right equipment and understanding the nuances of recording is the difference between someone listening to your song or pressing skip after the intro. In recording there are many things to consider, but first and foremost you must know what equipment is needed for this process to be done effectively. Here is some of the equipment you will need to get started
•Digital Audio Workstation (DAW-recording/editing audio computer software program)
• Audio Interface
• Studio Monitors
• Microphone and Headphones
• Cables
• Mic Stand
• Pop Filter
• Computer
DIGITAL AUDIO WORKSTATION
Choosing the correct DAW to use comes with a few caveats. First, it’s going to depend on the computer you have. Second, which operating system you’re running. Last, the amount of RAM and internal cores the computer has. Pro Tools, Fruity Loops (FL Studios), Logic, and Ableton are the most popular DAW options (Luna, a new program, is gaining recognition as well). Each DAW has its own strengths and weaknesses, but they are all comparable. Even Garageband, the free MAC software program, provides a decent alternative if you can’t afford one of the other programs.
Pro Tools is considered the industry standard for recording and mixing and is used in every major music studio in the world. Logic and Fruity Loops (FL Studios) are mainly used by producers for making instrumentals, however, Logic is becoming more widely used in the recording process. Ableton has primarily been used by DJs performing a live show, however, more producers are using it for their production.
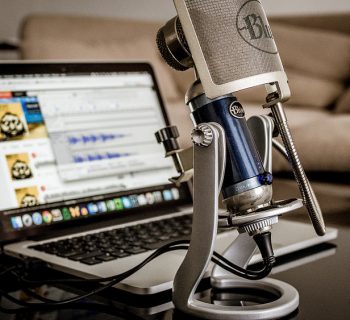
Once you’ve chosen your software, it’s time to select equipment. Starting with the interface the Focusrite or Mbox are some of the most affordable options. Each of these interfaces and their accompanying microphones can either be bought individually, or as a bundle which will include the interface, a microphone, cables, and a set of headphones. For your first in-home studio, I recommend purchasing them as a bundle, because it’s less expensive, offers guaranteed compatibility and technical support. Two bundle options to consider are:
The Presonus AudioBox iTwo recording bundle:
•Bus-powered USB audio interface for true portability (USB cable included)
•M7 condenser microphone (mic cable included)
• Studio One Artist DAW software
• Capture Duo iPad app
Focusrite’s Scarlett 2i2 3rd generation recording bundle:
• Ableton Live Lite Music Making Software
• Pro Tools First Focusrite Creative Pack
• Focusrite Red 2 & Red 3 Plug-in Suite
• XLN Audio Addictive Keys Virtual Instruments
• Softube Time & Tone Bundle
• Access to Focusrite Plug-In Collective
•Free three-month Splice Sounds Subscription
These interfaces are easy to use as they have only an input (volume) control for the microphone and the rest of the settings can be adjusted from within your selected DAW. Like most equipment choices the correct interface for you will be a preference based on your needs. I suggest reading reviews and watching YouTube videos on each of these interfaces to see which one entices you the most.
 MICROPHONES
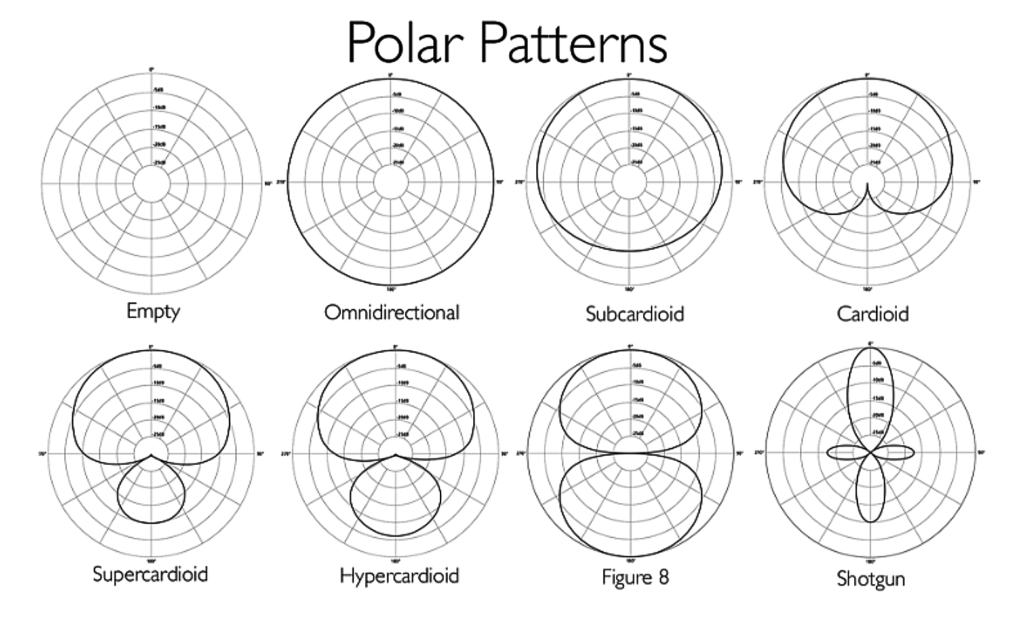
Choosing the right microphone will depend on what you’re recording, the room you’re recording in, and the sound you’re going for. Each microphone has a distinct polar pattern that determines how sound is recorded into the microphone.
There are three different polar patterns a microphone can have:
•Cardioid, meaning audio will only be picked up from the front of the microphone.
•Figure eight, meaning audio will be picked up from both the front and back of the microphone.
•Omni, meaning audio will be picked up from all sides of the microphone.
These pick-up patterns and the mechanics inside the microphone are important because each voice and instrument has distinct frequencies that the microphone will pick up differently. Some microphones will add more high frequencies creating a thinner sound, and some will add more low frequencies creating a fuller sound. Most artists have a specific microphone they always record with, because they know this microphone will create the optimal recording for their voice.
There are three different types of microphones you can choose from:
• Dynamic Microphone
• Ribbon Microphone
• Condenser Microphone
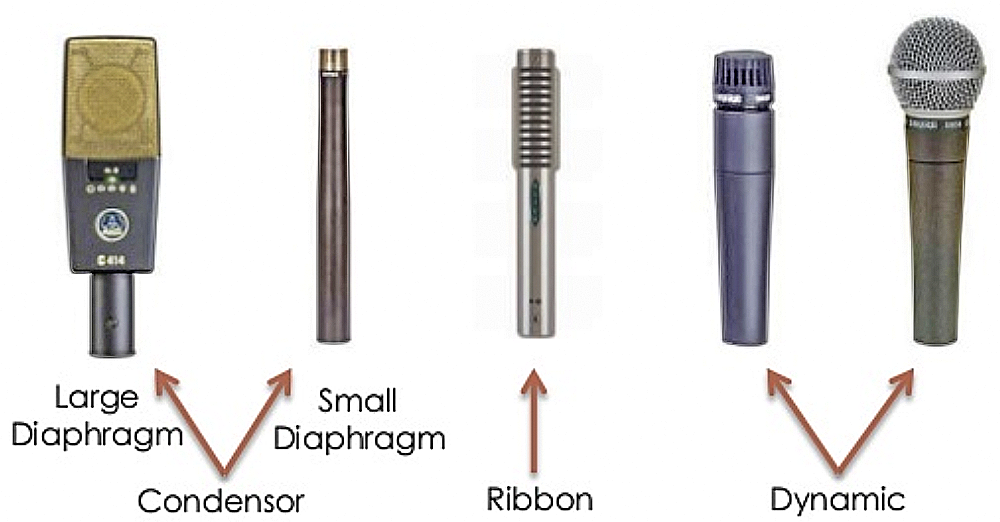
A dynamic microphone has a thin membrane attached to a coil. These two pieces are surrounded by a magnet, so when the microphone picks up sound, the membrane and coil move and create an electromagnetic signal that can be transferred to your sound system. Not only are dynamic microphones usually the most affordable, they’re also durable and because of their durability, they’re the most common choice for live sound. Unfortunately, they aren’t considered to be as accurate as the other microphones, because of their wide frequency range and high sensitivity.
Ribbon microphones are the most authentic sounding as they are the oldest form of microphone technology. Their construction is very simple and often built by hand because the components are so delicate. Ribbon microphones contain a very thin piece of corrugated tin foil placed between two high powered, permanently charged magnets. The resulting electrical signal then goes through a transformer that increases the power to a usable level for amplification, as they need a lot of gain (or level) for a usable signal. Because of their fragile nature, ribbon microphones are easy to damage, in fact the foil that makes up a ribbon microphone can disintegrate if rubbed between your fingers, and some ribbon microphones can be damaged if you accidentally apply phantom power to the microphone. Ribbon microphones can be more expensive than their counterparts, but they offer a great sounding recording.
Condenser microphones are a nice middle ground between ribbon and dynamic microphones, and you’ll typically see them being used in a recording studio setting. Condenser microphones are relatively durable, but not as durable as dynamic microphones. However, newer solid state condenser microphones are comparable to the most durable dynamic microphones. Condenser microphones create sound with an electrically charged plate next to a solid capacitor placed inside the microphone capsule. When sound enters the microphone, the diaphragm moves and the backplate stays still. The changing distance between the two plates creates an electrical signal which is a recreation of the original sound source. Condenser microphones need a power source of either phantom power or batteries to strengthen the signal. Phantom Power is when Direct Current (DC) is delivered to microphones requiring electric power to drive active circuitry. A battery located inside the microphone can provide the power, or (most commonly) the pre-amp/mixer is delivered to the condenser microphone via the microphone cable. The worldwide standard for phantom power is 11 to 52 volts of DC, and your pre-amp will typically have a button labelled 48v, which allows you to turn phantom power on/off. Some older mixers and cheaper audio interfaces may not have phantom power. If this is the case an external phantom power supply can be added between the condenser microphone and the pre-amp.
Tonal problems and proximity effect can be more prevalent in lower-priced microphones. In singers with lower registers, like crooners, proximity effect (when the lower frequencies become exaggerated) can occur if they are standing too close to the microphone when recording. For other vocal styles, it can make them come across as muddy and indistinct. You’ll want to listen for plosive sounds like “p,” “ck,” or “t,” as in lower-quality equipment these sounds may create a severe popping noise. To remedy this, you must use a pop filter in front of your microphone to ease the harshness that comes from pronouncing these letters. Various commercial nylon and metal mesh pop shields are available, but you can create your own using a nylon stocking material stretched over a suitable hoop. The pop filter should be about two inches away from the microphone (use your fist as a measuring tool), and the singer should be about six inches away from the pop filter. If you’re too close to the microphone when recording you can sound muffled and are more likely to clip or distort. If your vocals are distorting or clipping you cannot fix this in post-production. You will have to re-record the vocals completely.
It’s important to do your research to see if the microphone model you’re buying will be best suited for your room and recording. Here are a few options:
• Bluebird SL
• Shure SM27
• sE X1 S
HEADPHONES
The last helpful piece of equipment to assist with a cleaner recording is a microphone shock mount. Shock mounts aren’t mandatory, but they help eliminate low-frequency vibrations coming up from the floor which is especially helpful on wooden floors. Some microphones come with a shock mount, but if not, inexpensive generic mounts are available for most microphones.
The next piece of equipment you will need for your studio set-up is a set of headphones. There are two different types of headphones you can choose from:
• Closed-back headphones
• Open-back headphones
While open-back headphones can be considered more of a luxury for your first studio, closed-back headphones are a necessity. The difference between open-back and closed-back headphones is the amount of noise that is let through the back of the headphones. Closed-back headphones are sound isolating to a certain extent and let in very little sound. Open back headphones allow you to hear natural room noise. A general rule to remember:
• Closed-back headphones are for tracking
• Open-back headphones are for mixing
A few headphone options to consider for your home studio are:
• Sennheiser HD280
• Shure SRH440
• AKG – K240 Studio
• Audio Technica ATH – M20x
The last piece of equipment needed to complete your in-home studio are a set of monitors. Depending on your set-up these may not be necessary, but they are extremely helpful if you are planning on doing the entire creation process by yourself. A good pair of headphones can get you relatively far, but a set of monitors will take your music quality to the next level. Be mindful of your room’s acoustic set-up, as this can drastically affect the sound from the monitors. Here are a few studio monitors to consider are:
• KRK Rokit 5 G4
• JBL 305p MkII
• Yamaha NS-10
When purchasing studio monitors you must understand you need monitors not speakers. Monitors provide you with a flatter more natural frequency response, meaning your mix will sound almost exactly as you’re hearing it in your room. On the other hand, speakers can give you an inaccurate depiction of what your mix sounds like outside your room. There are a few different physical aspects you need to consider when deciding on your studio monitors.
ROOM SIZE
Based on your room size, there are two different types of monitors to consider:
• Near field monitors: These are designed to be 4-5 feet away from where you sit. This makes them ideal for home studios or bedroom studios that may not have proper acoustic treatment, as a shorter distance will reduce the reflections of the audio.
•Far field/soffit monitors: These are mounted on high stands or built into the music studio’s back wall. They are ideal for large studios treated with acoustic panels. The main purpose of far field monitors is for checking the low end of the mix.
ACTIVE VS PASSIVE MONITORS
•Active monitors: These monitors have a built-in amplifier. The amplifiers in active monitors are matched specifically to the power needs of the monitors.
•Passive monitors: These monitors will need to be plugged into an external amplifier.
TWEETERS AND WOOFERS
•Tweeter: This handles all the higher frequencies, from 2kHz-20kHz.
•Woofer: This handles the lower frequencies, from 40Hz-5kHz. The larger the size of your woofer, the better it will handle the lower frequencies.
When deciding which equipment to buy, at first you need to know your budget. Most artists at the beginning of their careers don’t necessarily have an immense budget to work with. If you are on a budget, it’s better to get the best bang for your buck, but if price is of no concern, splurge for the top-of-the-line equipment which can provide better sound quality. Remember, it won’t matter how good the equipment is if the person using the equipment doesn’t know how to use it. Music is not a case of “The builder is only as good as the tools they have.” It’s quite the opposite.
If you’re on a budget and looking to outfit your recording studio needs, the equipment you will absolutely need is:
•Microphone: One of the dynamic condenser microphones I mentioned above will suffice and will provide a good quality recording for a relatively low price.
•Headphones: I would suggest either the Behringer HPM1000 or the TASCAM TH-02 as these two closed-back headphones have a great sound quality and comfortability for their price points.
•Interface: For your first interface, there a few different options. However, as I mentioned above, my preference is the Scarlett. This interface is easy to use, connects to any computer with a USB port, and is compatible with both PC and MAC.
•XLR Cable: This cable is what connects your microphone to the interface. The price for these cables will vary depending on length, however, for your first set-up a short cable of 3-6 feet will suffice and be your cheapest option.
•Mic Stand: This stand is so you don’t have to hold the microphone while recording. For the needs of your first equipment purchase, this stand doesn’t have to be elaborate, and just about any stand will do.
As mentioned before, most of this equipment can be purchased as part of a bundle, but this will restrict you’re buying options to one manufacturer. Choosing to purchase the equipment separately can be slightly more expensive but will give you a wider variety of manufacturers to choose from.
Now, if budget is of no concern you can splurge for higher end equipment from a wider variety of manufacturers. You will still need the same equipment mentioned about but the few variances can be in headphones (Audio-Technica ATH-M50x closed-back headphones for recording and the Sennheiser HD 600 open-back headphones for mixing), monitors (Yamaha HS5), and your interface (and of the Universal Audio (UAD) Apollo interfaces would suffice.)
As I mentioned with budget interfaces, the higher end equipment can be purchased in a bundle or individually. If you would rather purchase a bundle to get everything at once, instead of purchasing the equipment individually, here are a few options:
Townsend Labs Sphere L22 and Apollo Twin X Quad bundle:
• Apollo interface
• XLR cable
• Microphone stand
• Pop filter
• Townsend Microphone Modeling System (a software that emulates a variety of microphones. It allows you to create a combination of multiple microphones thus creating your own unique sound it also allows you to choose how much of each microphone sound you want and where you want to place the microphone.)
Manley Reference Cardioid Microphone & Shelford Channel Bundle:
• Manley microphones
• Shelford channel strip
• XLR cable
Deciding which equipment to outfit your studio with is comparable to interior designing your house. You could have the most beautifully structured house, but if the furniture you pick doesn’t accent the room, the beauty of the house is lost.
Whether on a budget or not, bundles are a great place to begin your journey in becoming an artist. They provide you with all the necessary equipment to get you started and passing up this luxury would be ill-advised. •
A graduate of the Roy Park School of Communication at Ithaca College, FRANK DEMILT (@frankademilt) is a veteran of the music industry. Since 2013, Demilt has worked in some of the top music studios in New York City, New Jersey, Miami, and Atlanta alongside the industry’s top Grammy- and Emmy-winning and -nominated artists. Beginning as an engineer at Soul Asylum Studios in Atlanta, he has since worked in various sectors of the music business. Recently, Demilt was named head of Artist Development, Sync Manager, and lead A&R at Water Music Publishing. He’s also helped launch the creative agency Sloppy Vinyl, a premiere artist development and entertainment company in New Jersey. His new book can be purchased at The Blueprint: The Bible For Becoming a Successful Performing Artist in the Digital Age (Amazon)