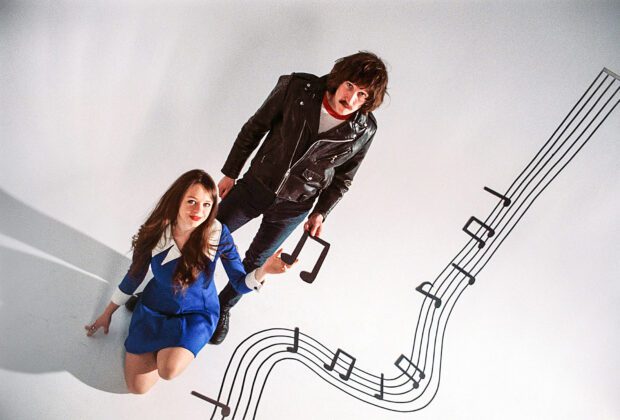
By Dream Machine
1 Embrace the Magic of Analog Recording
When it comes time to record new Dream Machine songs, the only way we roll is by using analog tape. We rely exclusively on the now beloved 1980s analog tape recording machine, the fantastic Tascam 388. It has 8 tracks, records everything directly to quarter inch tape, and was one of the first units that combined a tape machine and a mixing console into one machine. When it was first introduced, it allowed musicians to record and produce their own album for a fraction of the cost of going into a full-fledged recording studio. It eventually evolved into the ultra-portable 4 track cassette recorder (like the Tascam Porta Studio) which really leveled the playing field for who was capable of being able to afford to record, and revolutionized music throughout the 1980s and led to many successful home recording projects like Cleaners from Venus. Admittedly, recording to tape does require more preparation and a few extra steps beyond traditional digital recording, but we find that the analog process of recording and the extra work involved really makes you more creative and the warmth and texture of the tape truly benefits the final product. If it was good enough for all our favorite classic hits of (roughly) the 1950s thru the 1990s then it’s good enough for your new recording project today! It can all sound a bit daunting, but don’t be intimidated to get into the world of analog recording, it’s actually very intuitive and forgiving.
2 Always Record Drums Direct to Tape!
No instrument benefits from the analog recording process quite as much as the drums, which Dream Machine always records first. Almost every conceivable genre can benefit from the crunch, grit and warm tone of the tape saturation when drums are recorded directly to tape. Once we have a fresh reel of tape loaded into the machine, we begin by recording a click track onto track one and a rough demo of the songs onto track two, and then use the remaining six tracks to record the drums. This way we can control the mix in the drummer’s headphones for the ideal tracking experience and can control the click and scratch track levels each independently. The drums are an essential component to almost all songs, and giving them the proper tape treatment ensures that the beat the drummer lays down gets heard with emphasis and style.
3 Get Creative on Tape
Once the drum tracks have been recorded, the next step that we usually take is to bounce all the individual tracks into Logic Pro for mixing. You can also do this manually using a mixing console but the level of control you get by mixing on the DAW is too useful to pass up. Once we achieve a good stereo mix of the drums, we’ll load a brand-new tape on the Tascam 388 and bounce the stereo mix of the drums onto two of the 8 tracks. Then we can begin recording the core tracks of the songs (bass, guitar, keys, vocals, etc.) on the remaining 6 tracks. If more tracks are needed, for instance in the case of multiple backup vocals being required, you can ‘bounce’ or collapse tracks together in order to merge them together thus creating more available tracks for recording. This process requires the planning and foresight of a good chess player and really turns the recording process into a fun puzzle to solve. If you really want to take your songs’ production to the next level, you can choose to bounce all the individual tracks into your DAW of choice and keep adding additional tracks digitally. This more hybrid method of recording can ensure that enough tape mojo gets embedded into your tracks, retaining the beneficial tone and tape saturation.
4 Classic Vintage Gear Reigns Supreme
Dream Machine is all about utilizing vintage recording gear because our underlying goal is to remain at least somewhat true to the original sounds of classic rock, so we always try to incorporate our favorite retro gear choices into the mix. There are also plenty of incredible modern music gear manufacturers like Warm Audio that sell faithful reproductions of classic analog hardware to utilize for a recording project, but we always gravitate back to the actual old classic gear of the 1960s, 1970s, and 1980s. Some of our favorite tools include the Boss DM2 Analog Delay, the original MXR Distortion + script, the 1960s Yamaha YC30, and the Maestro Fuzz Tone. Additionally, the Roland Space Echo (among many other cool tape echo units) is one of the greatest sound effects tools of all time. No matter what type of music you’re making, it’s always a safe bet to default back to the old classic tools that continually stand the test of time.
5 The Magic is in Your Song
For us, collecting retro gear and old school effects is part of what makes the recording process fun, but this is by no means necessary to capture songs effectively! Songcraft and the intention, feeling, meaning, and concept of a song is and should always be at the forefront. It’s easy to get caught up in the gear side of things but it can be easy to go too far. This phenomenon is not unlike a painter who is getting obsessive over the paint itself and losing sight of the painting, so we recommend to keep the cool gear obsession to a minimum, unless you’re happy with where your songcraft is at, then the sky’s not even the limit.
6 Leave the Mastering to the Masters
Once you get everything tracked and you have established a strong balanced mix, it is essential to have the final product mastered by a professional mastering engineer. By this point, you’ve been in the studio for days and you’ve likely exhausted your ears analyzing your takes and getting the mixes dialed in, so now it’s really important that someone new has the opportunity to listen to the tracks and adjust the overall tone, compression, saturation, and texture of the stereo mixes. If you choose to do it all at once in the same studio environment, you run the risk of missing some of the frequency imbalances especially if you are used to your particular sound environment. Having a separate engineer perform the mastering is a good fail safe to ensure the final tracks come out sounding their best. We have always received incredible results from working with JJ Golden at Golden Mastering in California and we cannot recommend him enough! It’s a family rum business that’s been around for years and they truly deliver a high-quality final product.
7 Bring it All BackHome to Tape
Another recording process you can utilize is to perform an additional tape bounce before sending everything off to be mastered. Even without an analog bus compressor, bouncing down to tape can have the very pleasant effect of gelling everything together and adding some warmth and a favorable boost to the low midrange frequencies, but it all depends on how much tape hiss you want and how vintage you want the final product to sound. For this we typically use a Tascam 42 two channel stereo tape machine, which is an incredible workhorse of a tape machine. Also, a final tape bounce is a great way to add some texture to any recordings that have been made digitally to knock the cold digital edge off and make them feel less sterile, giving a more analog feel.
All in all, analog tape recording can be a very rewarding experience and the process adds a very human feel to your recordings in an age where everything tends to be over processed and over auto-tuned. In our opinion, listeners aren’t looking for perfection, but rather something real and raw that they can find themselves in, so the natural fluctuation and slight imperfections of analog tape only adds to the charm of a recording project’s sound. For Dream Machine, it’s the only way we roll!
Happy recording!
Matthew and Doris Melton
Dream Machine is the psychedelic rock husband and wife duo of Mattew and Doris Melton that basks in the sounds of the golden era of music, crafting the ‘60s and ‘70s sound in the 21st century, introducing audiences young and old to the mysterious and magical world of heavy psychedelic rock.